Why Customer Management Matters in POS

Imagine a customer walks into your store regularly. If your POS system remembers their name, phone number, previous purchases, loyalty points, and preferred payment method, the checkout experience becomes much smoother.
With customer management in Odoo 19 POS, you can:
For businesses focused on retention, this feature is incredibly valuable.
Prerequisites
Before creating customers in POS, make sure:
How to Create a Customer in Odoo 19 POS
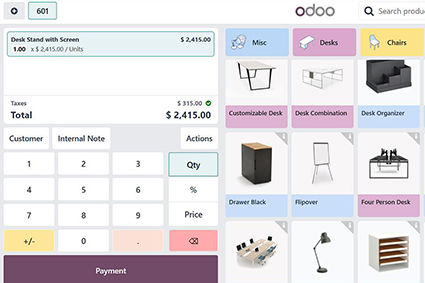
Step 1: Open the POS Session
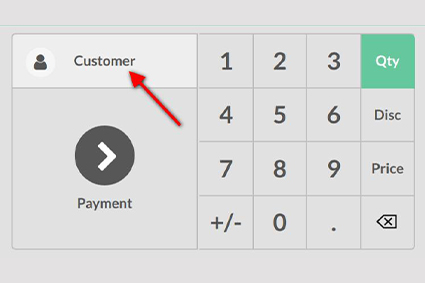
Step 2: Access the Customer Screen
Once the POS interface opens:
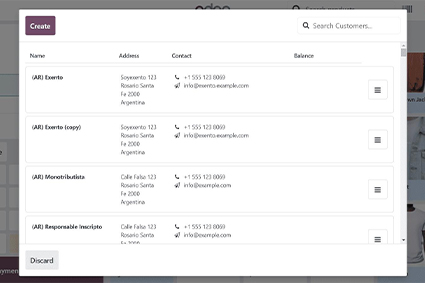
Step 3: Create a New Customer
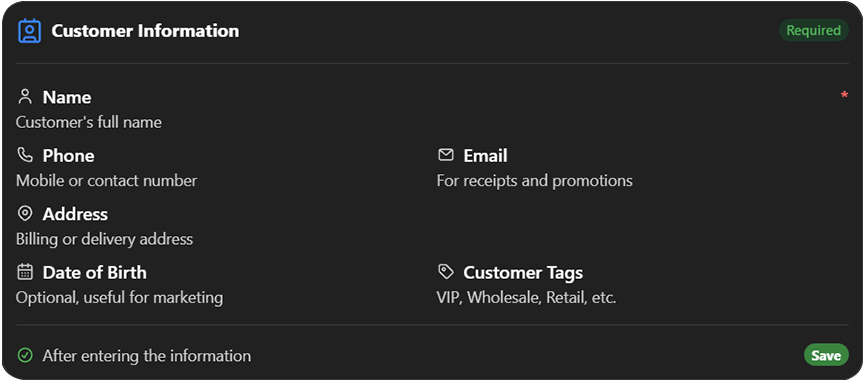
Click Create or New Customer and enter details such as:
The customer is now available for immediate use in the current POS order.
Assigning a Customer to a POS Order
After creating the customer:
This ensures the sale is linked to that specific customer profile.
How to Edit Customer Details
Customer information often changes. To update it:
Changes are synchronized with the main Contacts module in Odoo.